Thursday, May 22, 2014

Top 10 Blogs of 2014


#10: Acceleration and Velocity

 This was my number 10 favorite because this was one of the very first things that I learned in physics and I fully was able to grasp its concept due to the fact that I could relate it back to my favorite sport which was track. I chose to use a video as my medium which allowed me to visibly show the difference between velocity and acceleration. In a video I was also able to see a step to step progression as Usain Bolt began accelerating and then running with constant acceleration.


#9: Newton's 1st Law of Motion
Newton's 1st law of motion states that an object in motion, stays in motion unless acted on by an outside force and an object at rest stays at rest until acted on by an outside force. This is key because later on in physics we needed to fully understand this concept because this idea returned when we were discussing throwing a ball up in the air.

#8: Center of Mass vs. Center of Gravity
When discussing center of mass, you must understand that it is the average position of an objects mass. Center of gravity is when gravity is acting on that objects center of mass. These concepts interested me because as in my #10 blog, I was able to relate it back to something I enjoy doing, and that is playing football. A football player bends their legs because it now lowers their center of mass making it much harder to knock them over.


#7: Free Fall
When an object is in free fall, there is absolutely no air resistance. This was a difficult concept for me to grasp. The only thing pulling on the object is Earth's gravitational pull which it is accelerating to Earth at 9.8m/s^2 which as student we would automatically round to 10. If you were to drop a feather or a coin in free fall from the same height, which one would land first? EXACTLY! They would land at the same time.

#6: Torque
The concept of torque isn't my favorite thing about this word, but in fact the word is. Torque is equal to lever arm multiplied by force. This will give you the point in which a meter stick will rotate or help you solve for the weight of an object.

 #5: Work
The equation for work is equal to the force multiplied by the distance. To decrease the amount of force you need to apply on a box, one might use an incline or box and travel a greater distance. Work-in equals Work-out. That being said (Force-in)(Distance-in) = (Force-out)(Distance-out).

#4: Mousetrap Car Lab
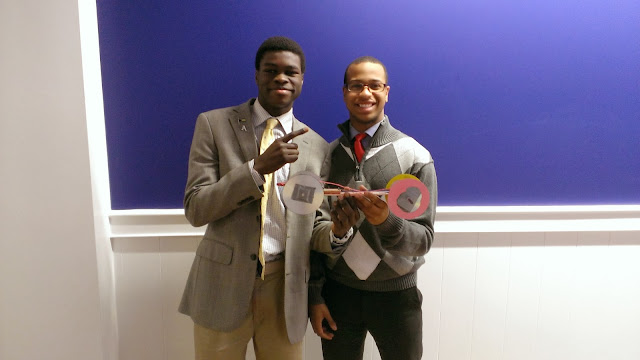
The mouse trap car lab was a really big experiment that my classmates and I participated in. It incorporated alot of physics including fun. In order to make the mouse trap car actually go, we had to fully understand Newton's Laws and incorporate them into our project. This was a fun activity but yet I still feel like I learned so much from this.


#3: Polarization
I struggled alot with the concept of Polarization. I was confused with the order in which things would follow in order to be polarized. However, after grasping the concept I am now able to answer the question why does a balloon stick to the wall after someone rubs the balloon with their hair? The answer is simple and is polarization.
#2: Magnetism
I really enjoyed learning about this topic this year. I learned alot about magnetism that I didn't know prior to this class. For example I learned that in a Magnetic Field, charges flow from North to South and back up from South to North. I also learned about what made magnets stick together, and how to turn a paper clip into a magnet. Magnets exist because the domain in an object stops moving out of control and actually aligns up.


#1: Wind Turbines
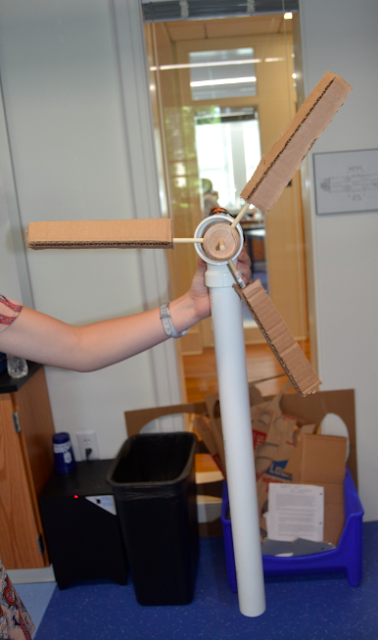
The wind turbine lab was one of my favorite labs because my group and I created a wind turbine in a single day, having no idea what was going to end up happening. Having the deadline due that day and having exactly nothing done do to states, my group had to work fast. We began applying concepts together in order to make this wind turbine work and to my amaze, it worked. We had to "grok" closely with this project and make sure all the pieces worked well together and they did.


Wednesday, May 21, 2014

Wind Turbine

Materials:
  • Pipes
  • Thin wire to produce the coils
  • hot glue
  • 4 small magnets
  • PCV pipe 
  • 90 degree pipe
  • Cardboard and wooden rod (to make the propellers)
Pictures:


Results: 
Like all groups, we had to produce a voltage using a wind turbine. Although we didn't get started until Monday, it was still amazing to have finished it all in one day.


Wednesday, May 14, 2014

Unit 7

Magnetism

Magnetic forces are due to movement of charged particles and all magnets have a north and south pole.


Like charges,  magnetic poles can attract or repel without touching. Opposite poles attract and like poles repel. The space around a magnetic contains a magnetic field.


  • Magnetic fields, as seen above travels from north to south. 
  • Magnetic domains are a cluster of atoms rotating "out of control" 
    • Magnets work when these domains begin to align and rotate all in the same direction. 

Generators/ Transformers

A generator is a way to induce voltage by moving a coil. This is possible by rotating the cop in a stationary magnetic field. Generator take in mechanical energy and out put electric energy

  • Transformers are machines that transfer energy from a primary to a secondary circuit.
  • Transformers are used to keep current low, which produces less heat which in turn saves energy. It steps up or down voltage without changing energy.
  • Primary is the input and secondary is the output. Now if the primary and secondary have the same amount of turns the input and output alternating voltages will be equal. BUT if the secondary coil has more turns then the primary then alternation voltage in the secondary is greater than the primary thus the voltage must be "stepped up" and if the primary is greater than the secondary the voltage must be "stepped down".
  • The relationship between the primary and secondary voltages in relation to the number of turns is show by the following equation:
The rate in which energy is transferred is called POWER

  • (Voltage X Current)primary = (Voltage X Current)secondary


Thursday, May 8, 2014

Unit 6 Blog Reflection

Charges:

  • opposite charges attract
  • like charges repel
    • Three Ways to Charge an Object
      • Contact
      • Friction (steals electrons)
      • Induction (charge without electrons)
Polarization:
  • Coulomb's Law: the force between any two charges is inversely proportional to the distance
  • Conductors: allows charges to move throughout an object
  • Insulators: stop charges from passing through the object
(In the picture, you see the opposite charges attracting through polarization)
This process happens because:
  • Opposite charges attract this a negative charged balloon attracts to the positive wall which enables it to now stick on the wall. It's all about the spreading of charges. 
Voltage:
  • Voltage is the charge difference over a unit of charge which is also known as the potential difference

Motor Blog

The motor performs a few different tasks:
  • The Battery-Provides the electrical energy of the motor
  • The coil of Wire-Carries current.
  • The Paperclip-Connects and holds the coil of wire to the positive and negative ends.
  • The Magnet-Aligns electrons in wire.
Joey scraped the outside layer of the wire (which will rests on the paperclip) in entirety at both ends of the wire.  We did this because if there was a steady current flowing through the wire the motor would not turn all the way around.  It would turn to halfway and then stop.  We scraped half of one side and the whole of another, which made it so that the the current would be across the the magnetic field would be up and the force would turn the motor. Therefore the motor would not be turned back flat after it was spinning we stripped half it would not be pulled flat and it would continue to spin around.

The Motor turns because the current is down the wire, the electromagnetic force is up, and the force spins the motor sideways.  If the wire was completely striped the force would flip and it would spin back resting sideways; because half of the wire is striped, the current will stop and the coil will flip the rest of the way around until the current reconnects.  By this time when there force on the motor it be in the right direction to spin the motor. 


Tuesday, March 4, 2014

Mousetrap Car Report

Micheal and I finished 3rd to last with a time of 6.63 seconds.

9

Physics of the Mousetrap Car


  • Newton's 1st law states that an object in motion stays in motion unless acted on by an outside force. The outside force in our experiment was friction or shall I say the lack if friction. Without friction our car would not move forward, however once adding friction to the car it traveled 5m. Newton's 2nd law says that force equals mass over acceleration. In order for the car to accelerate, Micheal and I needed to try to decrease the actual velocity of the car.Newton's 3rd law is every action has an equal or opposite reaction. The car pushed on the ground backwards, therefore we see that the ground pushed the far forward. 
  • The first type of friction was the friction between the brass rod and the disks. This was really important because our front wheels wouldn't be able to rotate if it hadn't. The second type of friction was caused by the balloon that was placed over the wheels. This allowed the car to start. We had problems getting the car to move at first but once we put the tape and balloons on the car the friction caused it to to propel forward. We wanted as much friction on the back wheels as possible because the more it pushed on the ground the more the ground pushed back on the car.
  • Micheal and I   needed four wheels on the cart in order to make it balanced. Also, we decided to use cds so that the cart could move faster, because if we decided to use large wheels the cart would move slower due to the fact that the diameter is larger and the RPM would be much slower.
  • The further back we put the lever arm the more potential energy the car had. This potential energy was then converted into kinetic energy which caused the car to move forward as we set the mousetrap.
  • Our lever arm was short, which may have something to do with the inconsistency of our car or even the velocity of our car. 
  • The role of Rotational Inertia was how fast the wheels rotated. Rotational velocity played a role of how much time it took our car to cover the five meters, or how fast the wheels turned on the axle. Tangential Velocity meant how fast our cars wheel actually moved.
  • We really can't measure work because work is force by distance where my group forgot to measure the actual distance and we did not know the force. We could not measure potential or kinetic energy either, for one needs a height to have potential energy, and we didn't and two one needs a velocity to measure kinetic energy, and we did not have that either.


Tuesday, February 18, 2014

Unit 5 Blog Reflection

In this unit, we talked a lot about work and power. 
The formulas are:
Work = Force * Distance (where force and distance must be parallel and must be proportional)
Power = work/time 
Work In = Work Out
Fin * Din = Fout * Dout

If we were to have a 30N box, and had to travel a distance of 2m in 3 seconds, how much power do I need? How much work is done?

In order to solve this, you must solve for work first so, you use Work = Force * Distance
          Work = F * D
          Work = 30N * 2m
          Work = 60J (work is measured in joules)
Now I can solve for power using, Power = work/time
           Power = work/time
           Power = 60J/3s
           Power = 20W (power is measured in watts)


Work also equals the change in Kinetic Energy.
Kinetic Energy is the energy of movement and written as KE.

The Formula for KE is:

KE = 1/2 m v²
∆KE = KE final - KE initial (this is another way to solve for work)


 Then there is potential energy. Potential energy is the lowest point in which an object can be located. Potential Energy (PE) and Kinetic Energy (KE) are inversely related to one another. 

Machines are used in order to make the force in work easier. These machines range from inclined planes to pulleys. An example of how inclined planes help decrease the force in the object is shown below.


If I were to have a 50N box and needed to lift it 1m its force would be to much for me to be able to lift, so I would use a ramp that is 10m long which is the new distance and knowing work in = work out I would only need to use 5N of force.  Machines are used to make your life much easier.

I didn't really struggle this semester, I didn't do well on a major quiz however, but that was due to me being lazy and not checking back over my work. I am feeling pretty confident about this test however. I also managed to meet my goal for this unit which was turn in all of my homework, and I plan to make that my goal for the next unit as well as getting at least a B on the test. Now here is a video my group made about machines.


Friday, February 14, 2014

Machines and Inclined Planes

I chose this video because it show a hands on experiment being done on the project which makes it easier to understand. He also shows us using many tools for us to see for ourselves opposed to just listening and believing him based off what we hear.


Friday, January 31, 2014

Unit 4 Blog Reflection

I. Rotational and Tangential Velocities
II. Rotational Inertia/Conservation of Angular Momentum
III. Torque
IV. Center of Mass/Gravity
V. Centripetal/Centrifugal Force

I. Rotational Velocity: Number of times you rotate per unit of time (Angular Speed)
   Tangential Velocity: The speed of something moving around a circular path
   Linear Velocity: The same as Tangential Speed


Less rotational inertia=easier to spin

This Unit told us that the center of a rotating circle moves slower than the outer parts of that circle. This is because they are rotation with the same rotational velocity, however, once you look on the outside which is much larger than the inside, you have to wander how it stays balanced or keeps up with the inside. It has more ground to cover therefore it goes faster.


II. Rotational Inertia: It is the property of an object to resist changes in spin
Lots of rotational inertia = harder to spin
A little rotational Inertia = easier to spin


Who is spinning faster, the one at the left or the one at the right?
Well the one on the left is because she is decreasing her rotational inertia by bringing her arms in which makes her rotate much faster than the one on the left who has her arms out.

Conservation of angular momentum means:
total momentum before = same momentum after
R.I. x R.V. before = R.I. x R.V. after
So if I have a.... R.I. x r.v. = r.i. x R.V.
angular momentum = rotational inertia x rotational velocity

III. Torque: something that causes rotation
      Torque = Force x Lever arm ( where the lever arm is the distance from the axis of rotation)
The bigger the lever arm the less force it takes to put into an object

IV. Center of Mass: the average position of an objects mass
      Center of Gravity: when gravity acts on the center of mass
This is why in football we bend our legs because one, we lower our center of gravity which makes it harder for us to fall over and two other players are bending their legs, but whoever gets their center of gravity the lowest, they will run over their opponents.


V. Centripetal/Centrifugal Force
     Centripetal force is the force that helps us turn. It does this by pulling us inward while we are wanting to go outward.


This unit seemed to be very interesting to me. Although I did reach my goal of understanding the material alot  better and actually paying attention in class, I feel that I need to do that alot often. As seen in the torque lab, I found the meter stick problem really challenging, however after constantly practicing it, I feel that I have mastered that concept. Physics is seen in everyday life, and more specifically, rotation is seen in everyday life, so this helped me understand something from real life.

Wednesday, January 29, 2014

The Meter Stick Lab

Our goal for the meter stick lab was to find the weight of the meter stick without weighing it, but instead using a table, an 100g weight, and the meter stick itself. The formulas that we will need to use in order to solve this problem are: w = m*g
                    lever arm * F = lever arm * F (counter-clockwise torque = clockwise torque)


To start this project, we had to find the center point of the meter stick as it balances on the table. Luckily, it balanced directly at the halfway mark which was 50 cm. Next you must add the 100g weight to the end of the meter stick, and immediately, we see that the meter stick drops off the table. Why is this? It's simply because it isn't balanced. In order for it to balance out, you would have to slide the meter stick creating what we scientifically would call a lever arm in order to find the torque of the object.


This is an example of what the new lab would look like. Seeing this, we can add the formula for torque which is: Lever Arm 1= 30         Lever Arm 2 = 20
counter-clockwise torque = clockwise torque
(lever arm)(F) = (lever arm)(F)
(30)(.98) = (20)(F)
29.4 = (20)(F)
  20         20
1.47N = F

W = (M)(G)
1.47N = (M)(9.8)
  9.8           9.8
.15Kg = M
150g = M

(Actual mass was 150.8)


Monday, January 20, 2014

Monday, January 13, 2014

Rotational Inertia

I chose this video because it shows us through a hands on demonstration the way that Rotational Inertia works. This video is short, sweet, and gets to the point.